Data Backup: Windows Disk/USB backup (Simple)
This method involves booting from a Windows bootable to recover individual files from a drive. If you don't have a bootable to use, we'll want to make one using the links below. (If you are planning on reinstalling Windows, we'll need it for that as well). This method will only let you copy one file at a time, so if you have a large volume of data you need to backup, you will want to use This guide here instead.
Click this link here for instructions on creating a Windows 10 bootable flashdrive.
Click this link here for instructions on creating a Windows 8 bootable flashdrive.
Click this link here for instructions on creating a Windows 7 bootable.
Step 1: Insert Bootable Media, and Shut Down The System
Place your DVD in the drive, or plug your bootable USB in. Then shut down the system.
As you turn the system back on, you'll start tapping a key (Below) repeatedly as fast as you can until it brings up a Temporary Boot Menu for your system. You may need to try a few different times if you don't get it the first time; The time period in which it accepts the input is pretty short. The key pressed depends on your specific system. If you know what brand of motherboard you have, it will most likely be the following keys:
- Xidax/Sager Laptop: F7
- MSI Motherboard: F11
- Asrock Motherboard: F11
- Gigabyte Motherboard: F12
- Asus Motherboard Desktop: F8
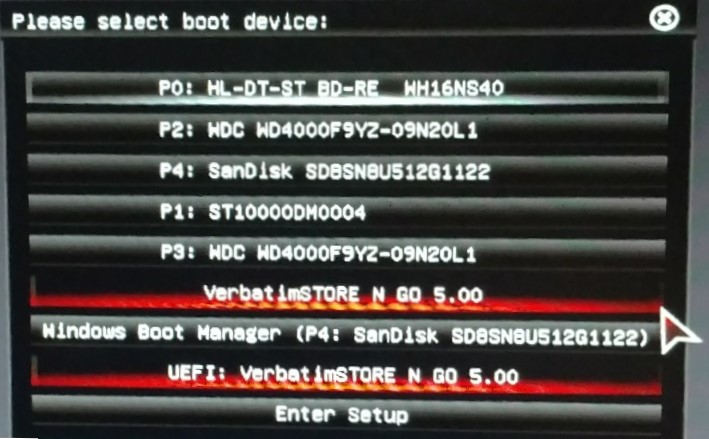
Step 2: Select your Bootable Media
The Temporary Boot Menu will look different depending on what kind of system you have. We are going to want to identify what our bootable looks like in the menu.
DVD: If you are using a DVD, you are going to be looking for the DVD drive. Take a look at each option, and see if anywhere in the option you see anything like "DVD" or "DVDROM".Your DVD drive probably shows up twice, select the option that DOES say "UEFI" in the front of it if possible. The system will then pop up a message saying to press any key to boot from the DVD. Make sure to press a key and it should work.
FLASH DRIVE: If you are using a flashdrive, it will most likely show up as the brand of the flashdrive you are using. Your bootable device will probably show up on the menu twice. One option will say "UEFI" in the front of it, and one will either say "SATA", "P#" or something else in the front of it (It might also say nothing in the front). IF it shows up just once, then select whichever option shows up. If it shows up twice, usually you'll want to hit the option that says "UEFI" at th front of the name. (Ignore other devices that say UEFI at the front of them)
If you don't know which is the correct option come back to this menu and go through the list sequentially until it takes you to the next step. If you have trouble during the reinstall itself for any reason, if your device showed up twice, then come back to this menu and choose whichever option you didn't before. If you can't get your bootable to boot at all, then you'll want to create your bootable again using a DIFFERENT flashdrive and possibly a different computer.
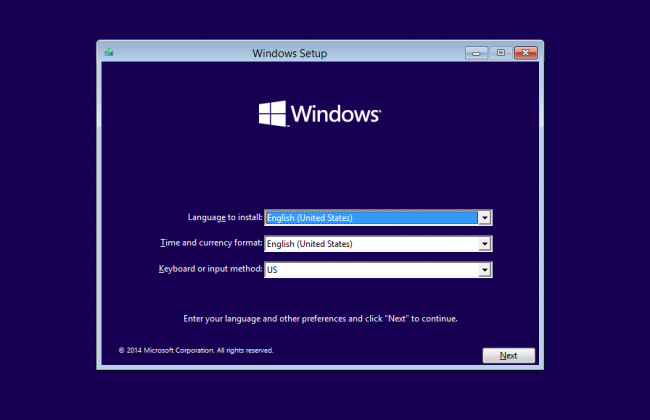
Step 3: Choose your Keyboard Layout and Language
This menu might take a while to come up. It will definitely take longer than your system normally takes to boot. So if it doesn't come up right away when you choose your bootable device, you might just need to wait a little longer
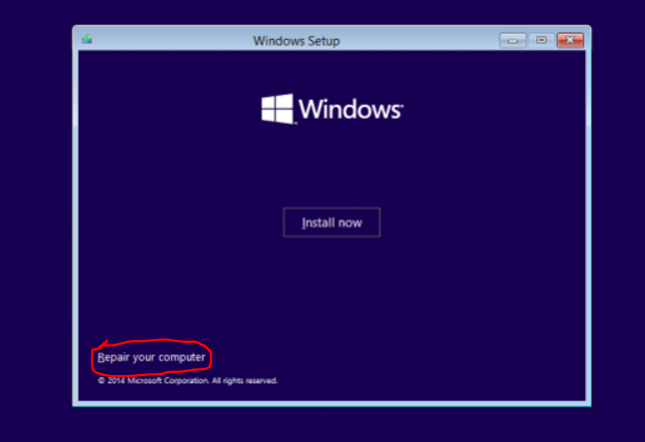
Step 4: Select repair your Computer"
DON'T select Install now.
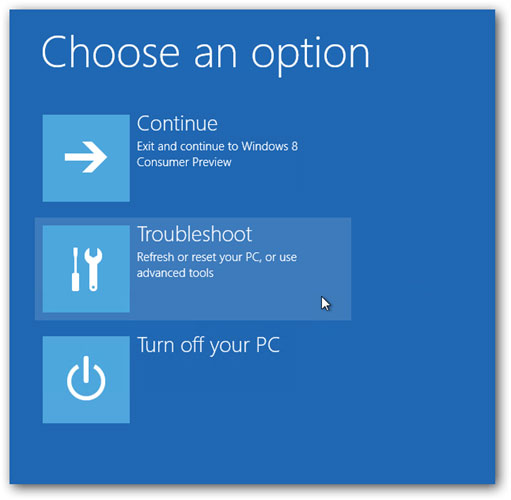
Step 5: Select Troubleshoot
On the menu that presents itself, select Troubleshoot
Step 6: Select Command Prompt
Select the option that says "Command Prompt"
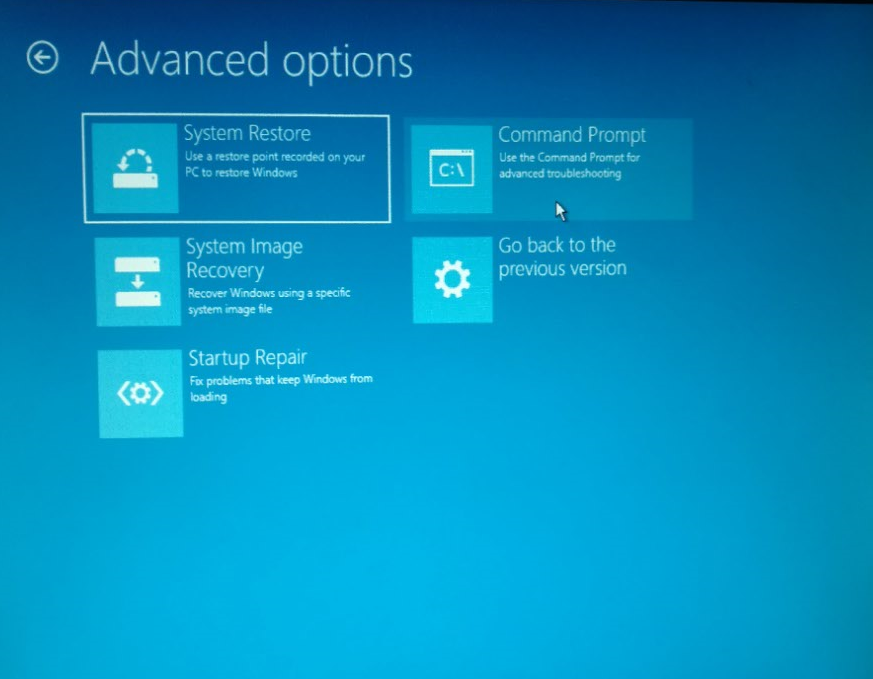
It should then bring up the following screen.
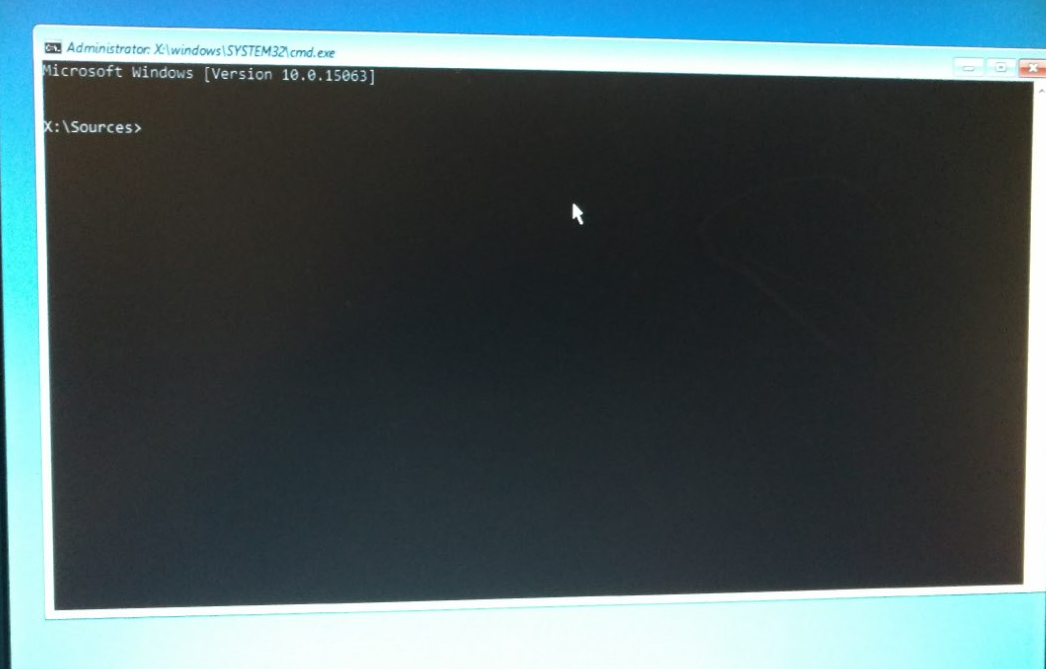
Step 7: Type Commands
Type the following into the command prompt, and hit enter:
notepad.exe
it should then open up a notepad file for editing text. In that notepad folder, select the file option in the top left corner, and go to "Save As".
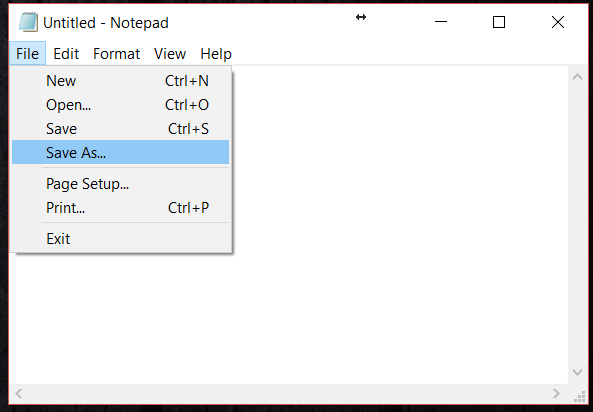
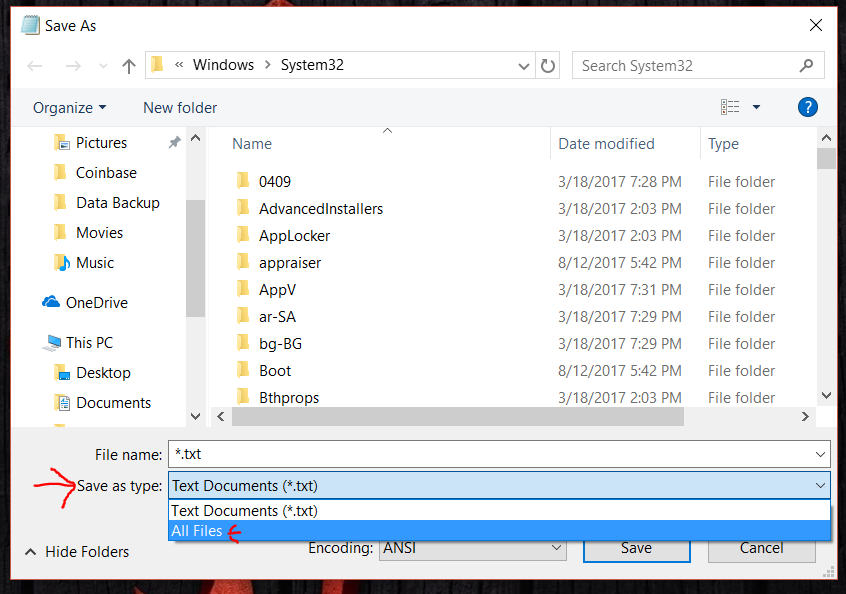
Step 8: Set "Save As" to All Files
This part is important. You need to hit the "Save As" menu and change the selected option from "Text Documents" to "All Files". Otherwise the only kinds of documents that will show up for you will be text documents. Because we are simply using this menu to get to a familiar file explorer kind of window to backup our data, it's crucial you change that setting.
Step 9: Backup your files!
You can now browse through the system to find the files you need to pull off. As far as what you need to grab and where you want to put them that's up to you. Keep in mind that if we reinstall windows, the only drive we'll HAVE to wipe will be that C: drive. So if you move your data to a secondary drive in your system, a flashdrive, or a external hard drive, then we should be set. For this method, you can only select one file at a time. Highlight it, right click on it, and hit "Copy". Then at the location you want to copy it to, right click on any empty space in it and hit "Paste".
Windows Reinstall
Once you've backed up your data, you'll most likely want to reinstall Windows itself. Click this guide to get started
Linux Drive
If the method you just tried didn't work for you, then you'll want to try creating a Linux flashdrive. This method will let you grab more than one file at a time.